# Temperature sensor installation
The following image display the layout of the inputs dedicated to the temperature sensors:
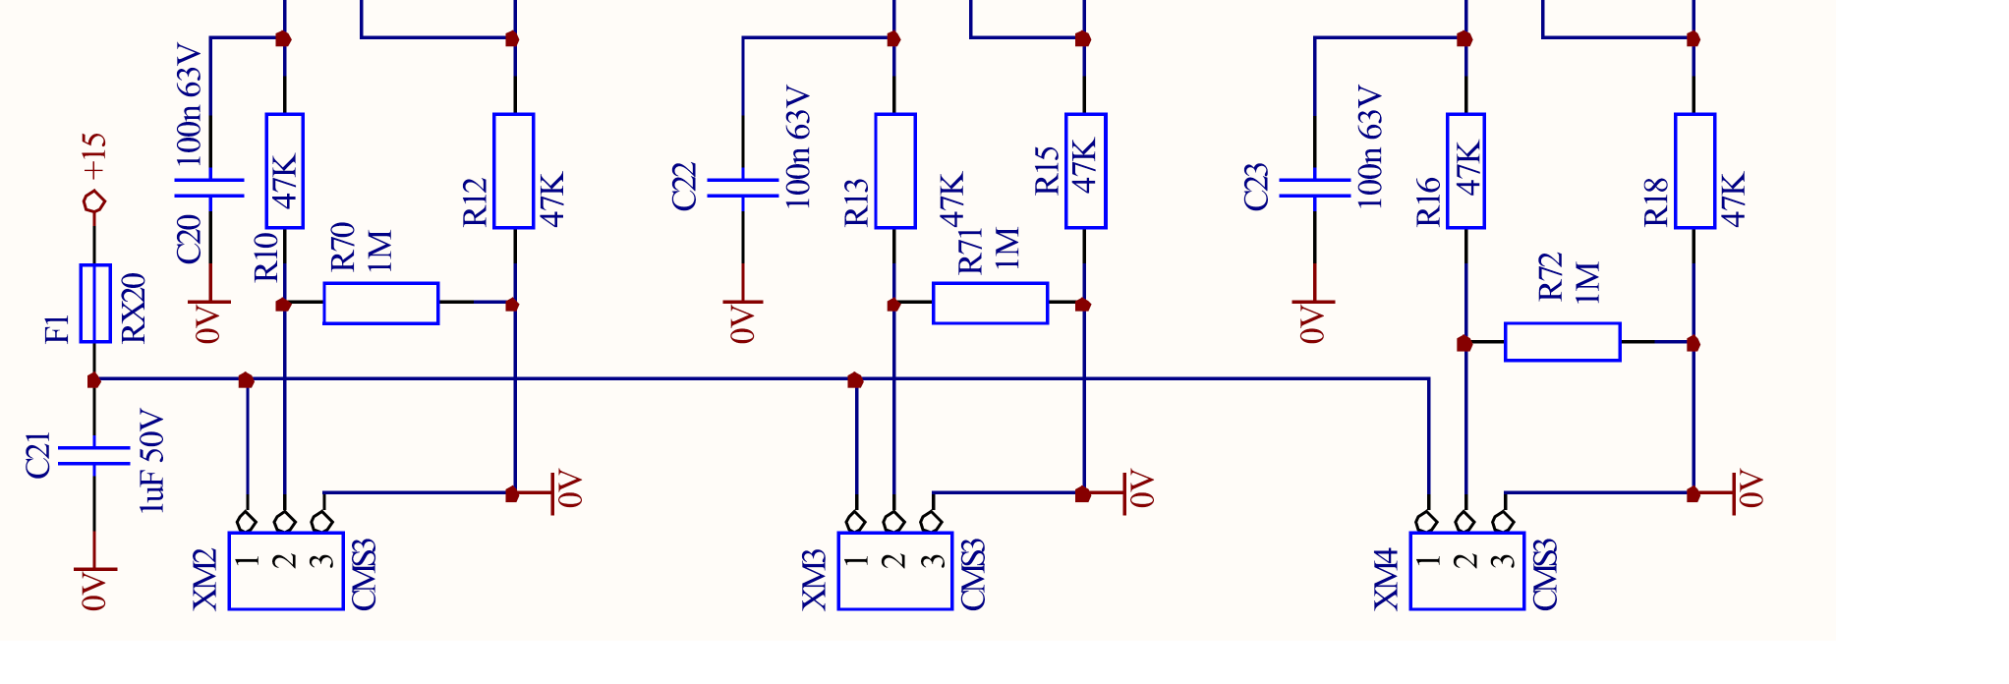
For regular temperature measurement, please use connector XM2 and accomodate the electrical connection as detailed in the table here below:
| MDB Sensor ID | Connector ID | Pin Num | Pin Function |
|---|---|---|---|
| Analog #1 | XM2 | 1 | +15v Supply |
| 2 | TEMP_SENS | ||
| 3 | GND | ||
| Analog #2 | XM3 | 1 | +15v Supply |
| 2 | AUX_1_SENSE_IN | ||
| 3 | GND | ||
| Analog #3 | XM4 | 1 | +15v Supply |
| 2 | AUX2_SENSE_IN | ||
| 3 | GND |
Comprehensive error (%FS):
- 2% FS
WARNING
- In order to avoid ground loops or GND reference offset, please make sure you do not connect the temperature sensor cable GND wire or the shielding to the system metal frame/enclosure.
- If the shield needs to be connected, please make sure to connect it only on one end of the temperature sensor cable.
TIP
Hera laundry is supplied by default with the shield not connected to the GND wire, but if necessary you can connect it on pin#3 of connector XM2. This isn't necessary in most scenarios, unless the washing machines are operating in an invironment that requires extra noise immunity.